废话少说
实现以上效果需要4步
- 读取图片
- 对图片像素处理(偏移, 模糊…)
- 画到画布上
- 动画
1. 读取图片

1
2
3
4
|
const imgObj = new Image();
imgObj.onload = () => cb(imgObj);
imgObj.src = 'rocket.png';
|
2. 获取信息
canvas提供drawImage接口能把图片或是另一画布画在当前画布上,同时还有getImageData能从画布上获取某一块画布的信息。
1
2
3
4
5
6
7
8
9
10
11
12
13
14
15
16
17
18
19
20
| ctx.drawImage(imgObj, image.x, image.y, image.width, image.height);
const imageData = ctx.getImageData(image.x, image.y, image.width, image.height);
const particles = calculateParticles(imageData.data, function generateStart() {
return {
x: canvas.width / 2,
y: canvas.height
}
});
|
3. 画到画布上
1
2
3
4
5
6
7
8
9
10
11
12
13
14
15
16
| function draw() {
for (let i = 0; i < particles.length; i++) {
const particle = particles[i];
particle.time++;
ctx.fillStyle = particle.fillStyle;
ctx.fillRect(
particle.x,
particle.y,
2, 2);
}
}
|
4. 动画
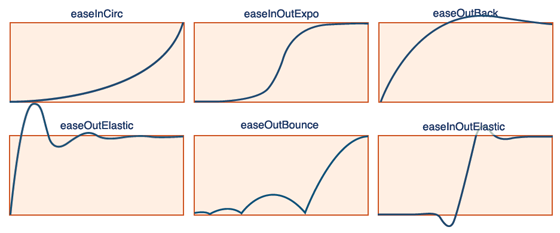
缓动函数
指定动画效果在执行时的速度,使其看起来更加真实

1
2
3
4
5
6
| function easeInOutExpo(t, b, c, d) {
t /= d / 2;
if (t < 1) return c / 2 * Math.pow(2, 10 * (t - 1)) + b;
return c / 2 * ( -Math.pow(2, -10 * (t - 1)) + 2) + b;
}
|
1
2
3
4
5
6
7
8
9
10
11
12
13
14
15
16
17
18
19
20
21
22
23
| function draw() {
ctx.fillStyle = backgroundColor;
ctx.fillRect(0, 0, width, height);
for (let i = 0; i < particles.length; i++) {
const particle = particles[i];
particle.time++;
ctx.fillStyle = particle.fillStyle;
ctx.fillRect(
easeInOutExpo(particle.time, particle.x, particle.offsetX, totalTime),
easeInOutExpo(particle.time, particle.y, particle.offsetY, totalTime),
2, 2);
}
requestAnimationFrame(this.draw);
}
|
总结
源码地址
优化
效果上
性能上
- 避免不必要的Canvas绘制状态频繁切换
- 避免使用浮点数坐标
另一个随机效果

